Getting Started
This getting started guide walks you through the core features of Nuclide and aims to get you productive quickly.
If you are new to Atom, you can find more information about its features in the Atom Flight Manual. Then, to find out more about using Nuclide, see Basics or any of the other guides available in the Nuclide documentation.
Installation
The installation guides provide detailed information to install Nuclide on your platform, but if you have already met the platform dependent prerequisites (macOS | Linux), you can install Nuclide easily from within Atom itself.
Nuclide can be installed on Windows, but it is not fully supported.
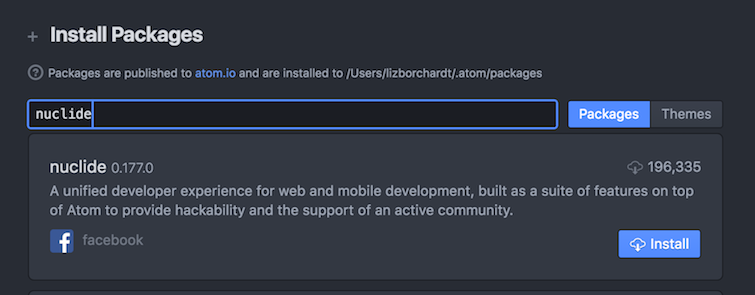
- Open Atom.
- Choose
Atom | Preferences(Edit | Preferenceson Linux andFile | Settingson Windows) to bring up the Settings tab. - In the Settings tab, select Install from the list at the left.
- In the search box, type “Nuclide” and press the
Enterkey. - Click the Install button for the
nuclidepackage.
Installing Nuclide within the Atom Packages UI is the recommended method, however you can install Nuclide from the command-line, if you wish, using:
$ apm install nuclide
Packages
If you want features such as Quick Open, Remote Development, and Mercurial support to work correctly, you also need to install Watchman and ensure it is in your $PATH environment variable. There are other recommended package installations as well.
Launch
After installation, launch Nuclide by opening Atom. Once Atom is open, you should see the Nuclide Home page.
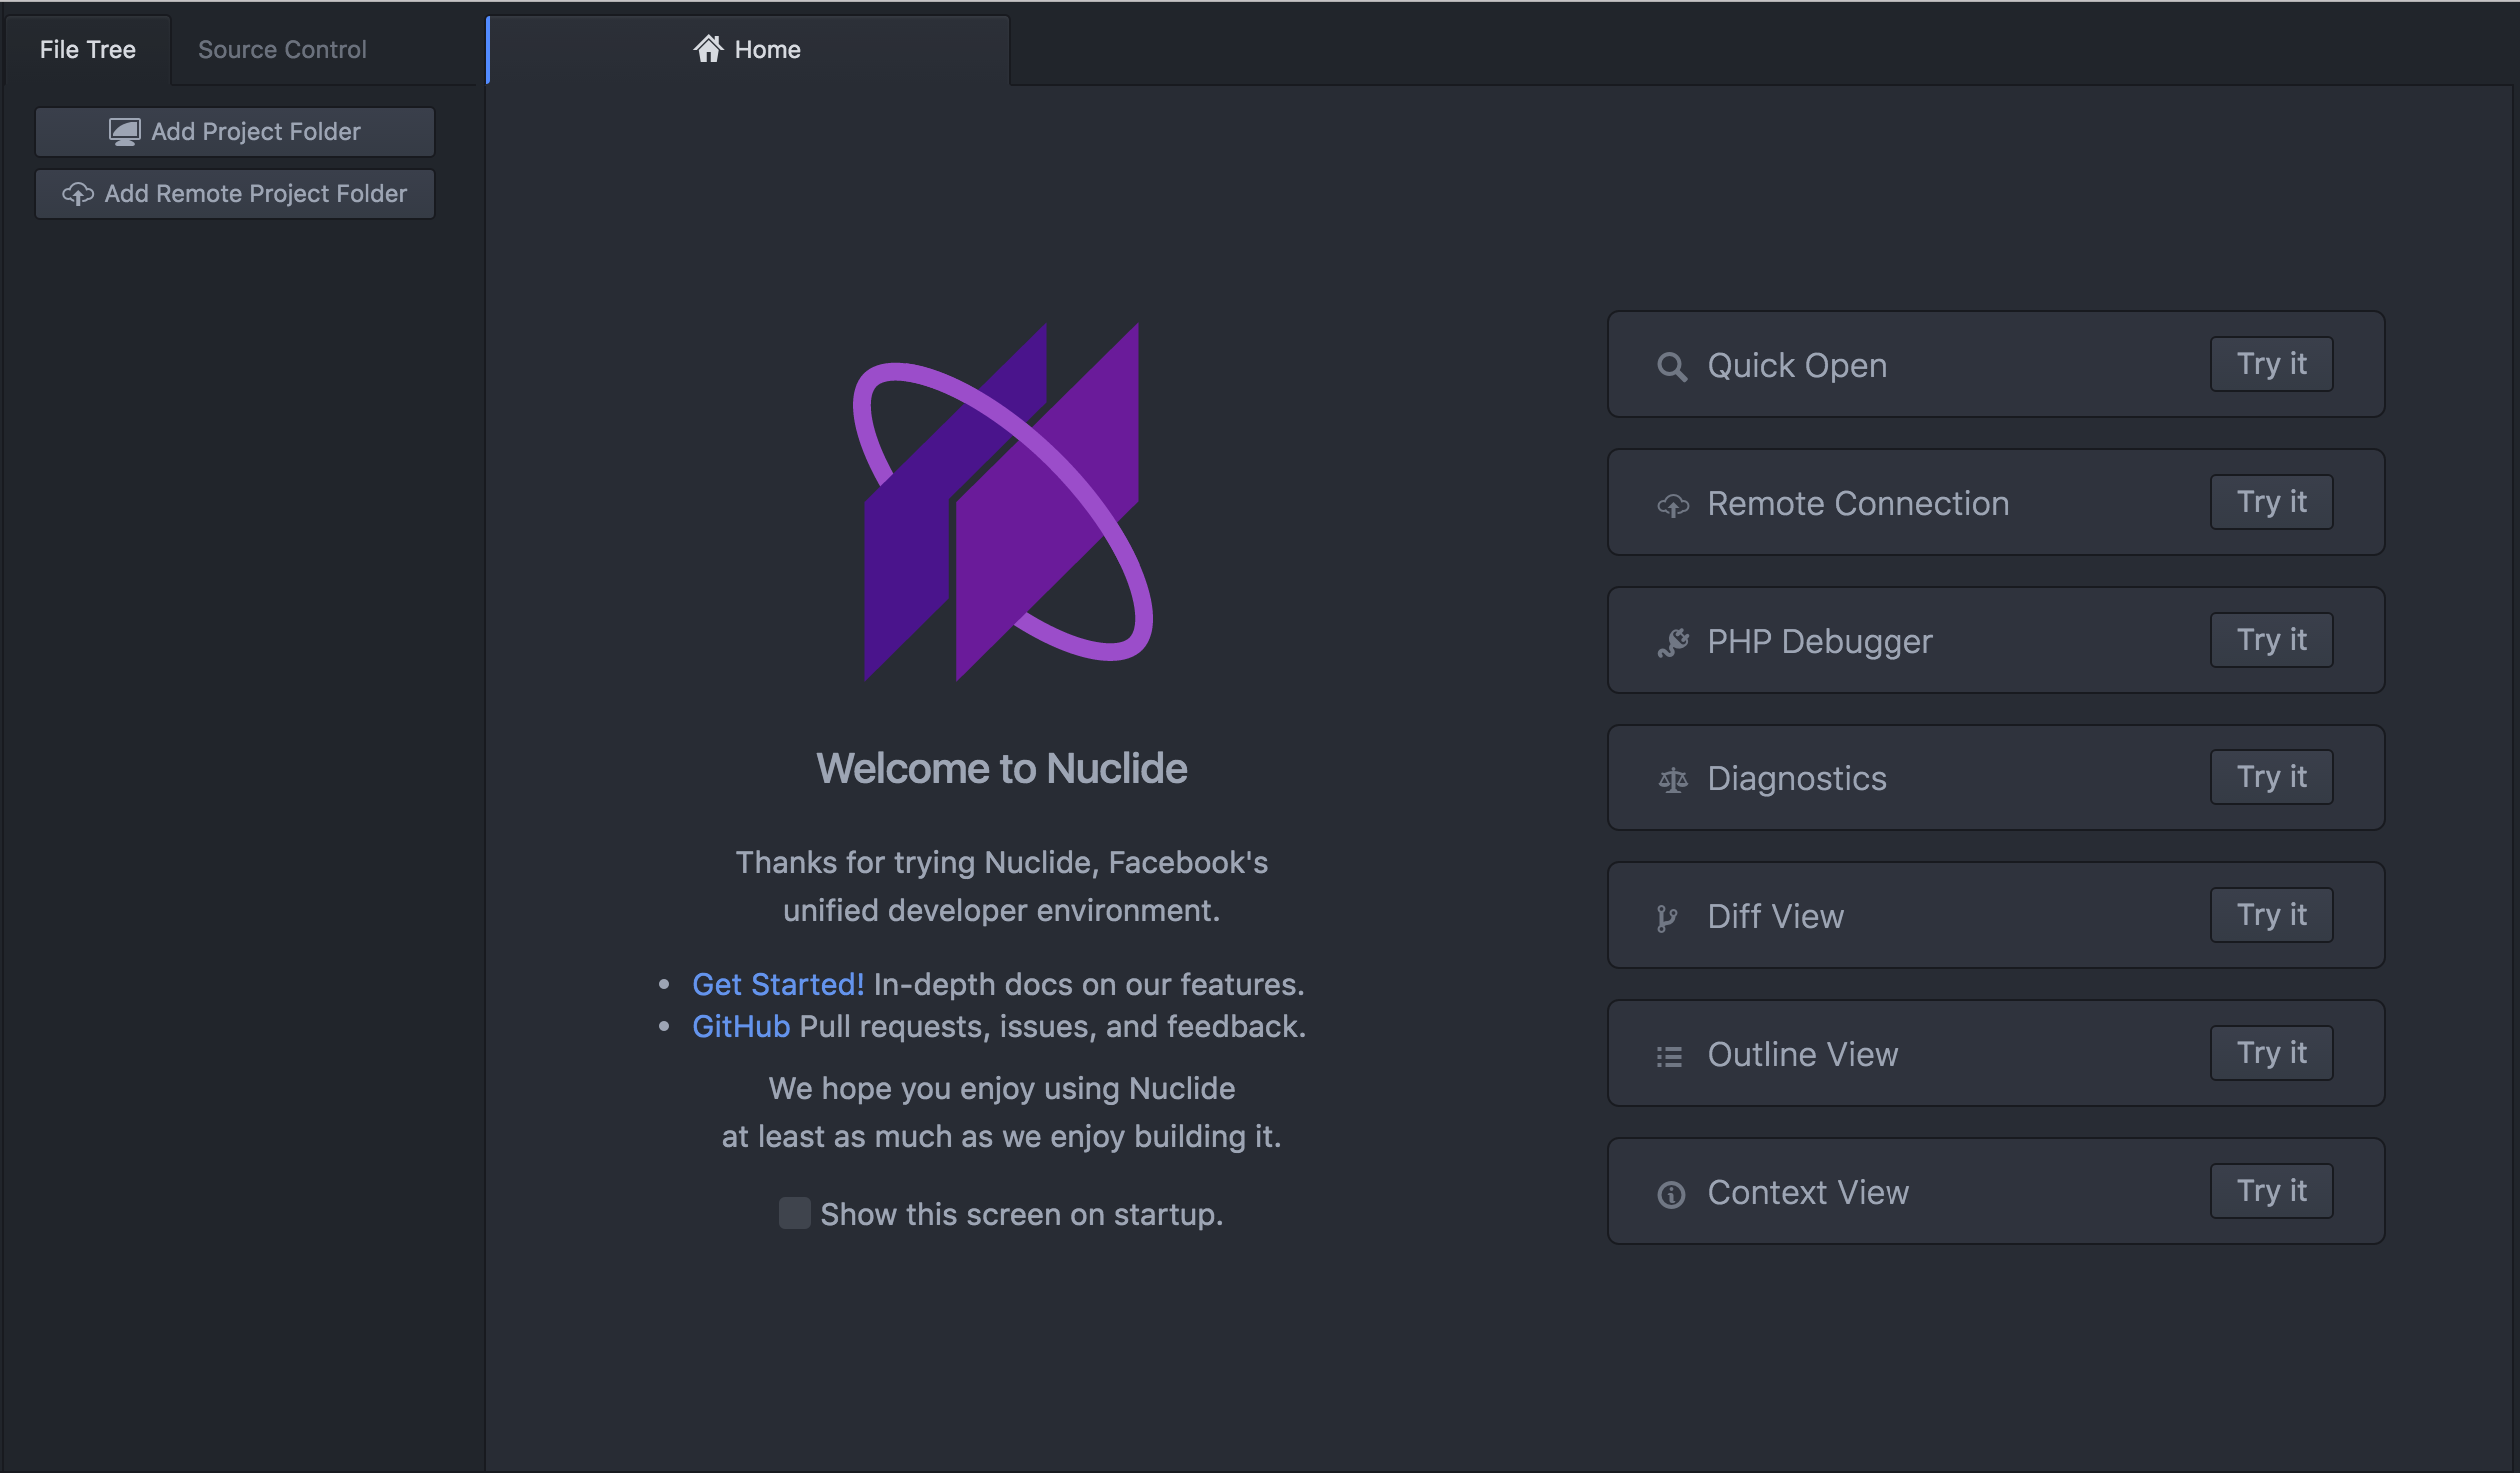
- The left side-pane is the Nuclide Project Explorer.
- The main pane contains introductory information about Nuclide and the Quick Launch Menu. This is also where you will edit your files (just like in normal Atom).
- The bottom status bar shows you error and health statistics.
Adding a Project
The first common step after launching Nuclide is to open a project you would like to work on. This could be a Hack, Flow, or any other project that has a root directory.
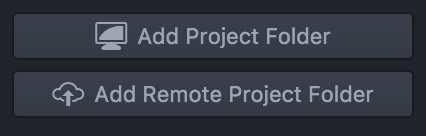
To add a project, click the Add Project Folder button in the left side-pane, use the Cmd-Shift-O keyboard shortcut (Ctrl-Shift-O on Linux), or choose
File | Add Project Folder from the Atom menu bar.
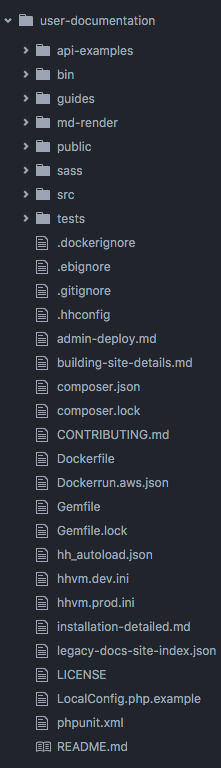
After adding a project you will see the root of your project at the top of the Project Explorer’s File Tree with all files and folders as a tree hierarchy underneath it.
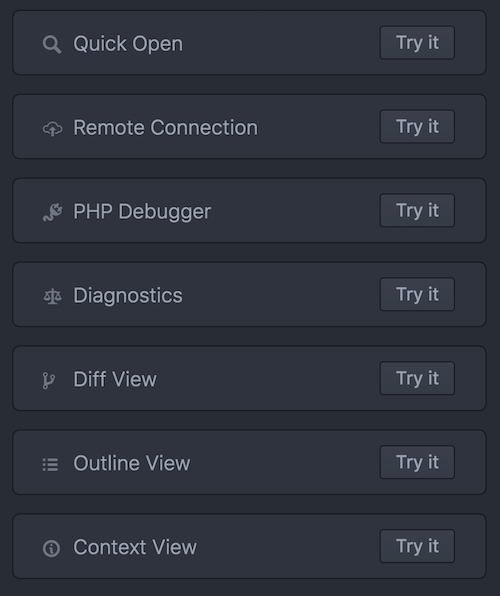
Quick Launch Menu
On the Nuclide Home page you will find the Quick Launch Menu that gives quick access to many of the popular features of Nuclide. Click the Try It button of any feature to use it.
Quick Open
The Quick Open feature gives you access to Nuclide’s file
search mechanism, including OmniSearch, which quickly displays recently opened files, quick searches for files based on partial names, and depending on the project, can search within files for symbols, etc. Click Try It or use the Cmd-T keyboard shortcut (Ctrl-T on Linux) to access the feature.
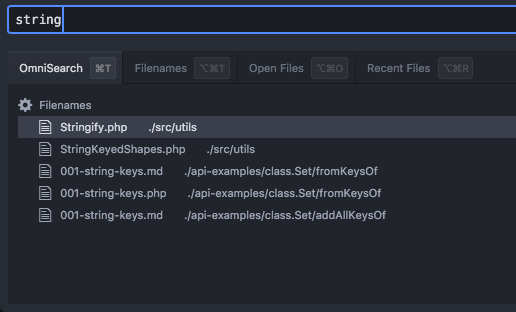
You can also search by filenames in your project, filenames of currently open files, and see which files have been recently opened.
Remote Connection
Nuclide provides the ability to do remote development out of the box. This allows you to have Nuclide installed on a local machine, your project on a remote machine, and have your editing experience be seamless between the two.
Nuclide provides a server that bridges your local client with the remote development machine. In order for remote development to work correctly, you must meet the prerequisites on the remote machine before installing the Nuclide server.
Once the prerequisites are met, you can install the server on the remote machine.
In order to connect to your remote project, click on the Try It button next to
Remote Connection in the Quick Launch Menu. You can also select Nuclide | Remote Projects | Connect to Remote Project...,
use the Ctrl-Shift-Cmd-C keyboard shortcut, or click Add Remote Project Folder
in the Project Explorer (however, please note that if you have other projects open that button will not be there).
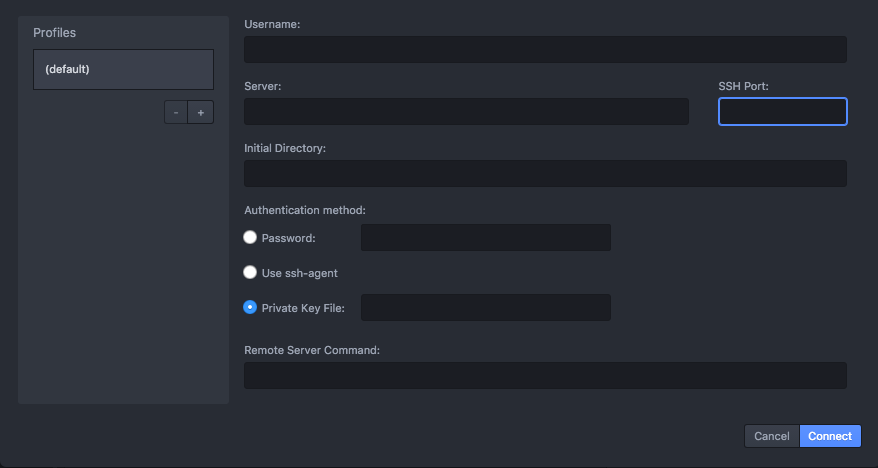
Enter all the necessary credentials, including the username for logging into the remote server, the
server’s address, and the actual root directory of the remote project you want to open. Then, if you installed the Nuclide Server as instructed, the Remote Server Command is
nuclide-start-server.
Any changes you make in the local Nuclide editor will be communicated back to the remote server and properly synchronized.