Buck
Nuclide supports many common workflows with the Buck build system. See the Buck website for instructions on how to install Buck and create a Buck project.
Getting Started
First, open a Buck project (any project with a .buckconfig file) as a project
in Nuclide.
Enabling Buck’s httpserver interface is recommended for better Buck output in Nuclide.
If you have multiple projects open, or if your Buck project is a subdirectory of one of your project roots, you’ll need to mark the Buck project root as the Current Working Root. You can do this by right-clicking on the root folder in the file tree and selecting Set to Current Working Root.
There are a few ways to trigger Buck commands from Nuclide:
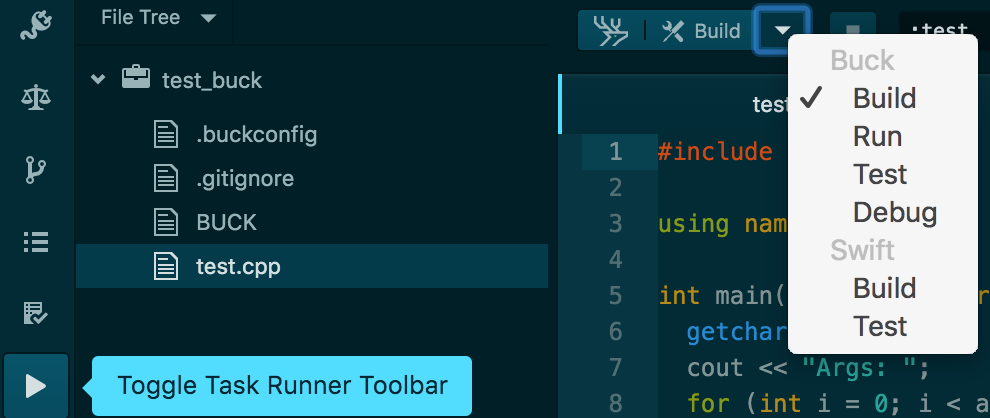
Via the Task Runner
Buck tasks live in the Task Runner toolbar.
Click the Toggle Task Runner Toolbar button (i.e., the play icon) from the Nuclide toolbar. Alternatively,
go to Nuclide | Task Runner | Toggle Toolbar Visibility.
Choose any of the Buck tasks from the Task Runner toolbar’s drop-down menu.
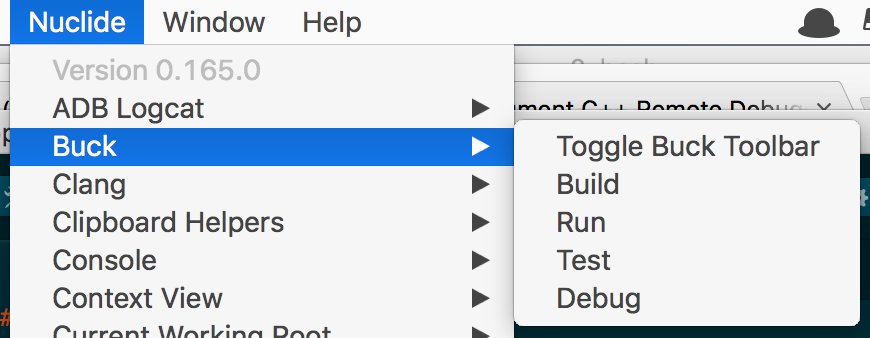
Via the Nuclide menu
The top-level Nuclide menu contains a Buck submenu.
Via Atom’s Command Palette
Open the Command Palette (Cmd-Shift-P or Ctrl-Shift-P on Linux/Windows)
and type “buck” in the text box:

You can use these commands to add keybindings in Atom’s keymap:
'atom-workspace':
  # note: commands are case-sensitive
  'cmd-b': 'nuclide-task-runner:toggle-buck-toolbar'
  'f5': 'nuclide-task-runner:buck-build'
  'f6': 'nuclide-task-runner:buck-test'
  'shift-cmd-k': 'nuclide-buck:open-nearest-build-file'
  ...
Workflows
Nuclide supports Buck workflows matching the corresponding Buck command-line tasks via the Task Runner toolbar. See the Task Runner Buck guide for more information on the following Buck workflows: