Toolbar
Nuclide customizes the tool-bar community Atom package for its specific use. The Nuclide Toolbar provides quick launch access to many common features including the Debugger, Diagnostics, etc.
By default, the Nuclide Toolbar is not installed.
Internally to Facebook the Toolbar is installed, by default. However, at this point, we did not want to presume to install other community packages without the user opting in.
Installing
The Nuclide Toolbar can be installed as part of installing the recommended packages through the Nuclide package settings or it can be installed separately through the normal Atom package installation process.
Singular package
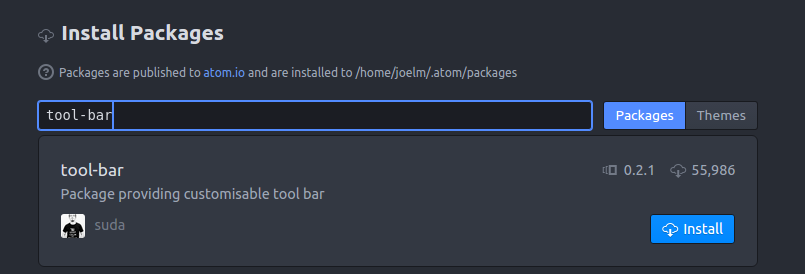
If you would prefer not to have all of the recommended Nuclide packages installed, you can install the Toolbar separately.
- Go to
Packages | Settings View | Install Packages/Themes. -
In the
Search packagestext box, type “tool-bar”.

- Click the Install button for the
tool-barpackage.
The Toolbar will be added to your Nuclide environment (normally either at the top or along the left side of your Atom window).
Toggling
You can toggle the Nuclide Toolbar either through Packages | Tool Bar | Toggle or by pressing Cmd-Option-T
(Ctrl-Alt-T on Linux).
Buttons
The Nuclide Toolbar has buttons that, when clicked, take you to a specific feature of Nuclide.
 |
Toggle Diagnostics Table |
 |
Toggle Outline View |
 |
Toggle Context View |
 |
Toggle Task Runner Toolbar |
 |
Toggle Debugger |
 |
Toggle Test Runner |
 |
Toggle Console |
 |
Toggle Distraction-Free Mode |
 |
Open Nuclide Settings |
 |
Toggle Nuclide health stats |
Uninstalling
You can uninstall the Nuclide Toolbar by following the normal Atom package uninstall mechanism.
- Go to
Packages | Settings View | Update Packages/Themes. - Click the Uninstall button under the
tool-barpackage.
If you uninstall Nuclide, the
tool-barpackage is not uninstalled.
