Setup
There are two supported platforms for Nuclide, Linux and macOS.
Nuclide can be installed on Windows, but it is not fully supported.
These instructions are for installing the released package of Nuclide. For advanced users, you can build from source, but this is not officially supported and stability is not guaranteed.
Quick Install
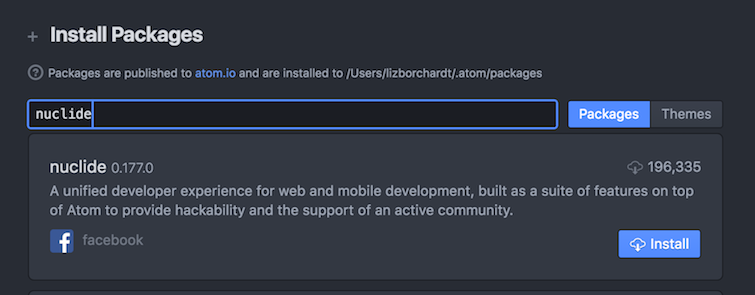
Assuming you have met all the prerequisites for your platform, the easiest way to install Nuclide is within Atom itself:
- Open Atom.
- Choose
Atom | Preferences(Edit | Preferenceson Linux andFile | Settingson Windows) to bring up the Settings tab. - In the Settings tab, select Install from the list at the left.
- In the search box, type “Nuclide” and press the
Enterkey. - Click the Install button for the
nuclidepackage.
Installing Nuclide within the Atom Packages UI is the recommended method, however you can install Nuclide from the command-line, if you wish, using:
$ apm install nuclide
Otherwise, see your installation platform below for detailed installation instructions, including prerequisites.
macOS
Prerequisites
You can follow the instructions on the Atom website. Essentially, if you go to Atom.io, there will be direct link to download Atom.
Installation
Install Nuclide through the Atom Packages UI:
- Open Atom.
- Choose
Atom | Preferencesto bring up the Settings tab. - In the Settings tab, select Install from the list at the left.
- In the search box, type “Nuclide” and press the
Enterkey. - Click the Install button for the
nuclidepackage.

Installing Nuclide within the Atom Packages UI is the recommended method, however you can install Nuclide from the command-line, if you wish, using:
$ apm install nuclide
Linux
Prerequisites
Git is required to install Atom on Linux.
There are instructions on the Atom website for installing Atom on Linux, but it doesn’t mention the Git requirement.
Instead, follow the command-line process below which shows you the installation of all the necessary prerequisites, including Git.
This is an installation on Ubuntu. If you are using an RPM-based distro, you should replace the
apt-get commands with the appropriate rpm or yum commands. Depending on your permissions, you
may need to prefix these commands with sudo.
$ sudo apt-get update
# optional
$ sudo apt-get upgrade
$ sudo apt-get install git
$ sudo add-apt-repository ppa:webupd8team/atom
$ sudo apt-get update
$ sudo apt-get install atom
# Run atom from the command-line if you want
$ atom
Installation
Install Nuclide through the Atom Packages UI:
- Open Atom.
- Choose
Edit | Preferencesto bring up the Settings tab. - In the Settings tab, select Install from the list at the left.
- In the search box, type “Nuclide” and press the
Enterkey. - Click the Install button for the
nuclidepackage.
Installing Nuclide within the Atom Packages UI is the recommended method, however you can install Nuclide from the command-line, if you wish, using:
$ apm install nuclide
Windows
Prerequisites
Atom can be installed on Windows.
You can follow the instructions on the Atom website. Essentially, if you go to Atom.io, there will be direct link to download Atom.
Some features of Nuclide may work on Windows, but the full Nuclide experience is not yet supported.
Remote development functionality (seeing the directory tree, editing remote files, etc.) is generally successful on Windows. If you have Hack or Flow on a remote server, it is possible that you could get some of those language integrations to work as well.
However, local projects may run into issues.
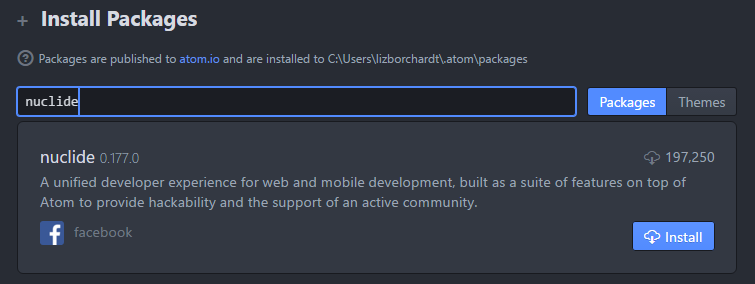
Installation
Install Nuclide through the Atom Packages UI:
- Open Atom.
- Choose
File | Settingsto bring up the Settings tab. - In the Settings tab, select Install from the list at the left.
- In the search box, type “Nuclide” and press the
Enterkey. - Click the Install button for the
nuclidepackage.

Post Installation
After installation, running Atom will automatically load Nuclide.
Recommended Packages
By default, Nuclide does not install all of the recommended Atom packages that enhance the Nuclide experience. This was done purposely in order to ensure that users have to opt-in to some features rather than obtrusively modify their work environment.
Recommended packages include:
tool-barto enable the Nuclide toolbar.sort-linesto enable sorting lines of text.language-ocamlto enable OCaml language syntax highlighting.language-babelto enable language grammar for JS, Flow and React JS, etc.- …and others under
package-deps.
In order to install all of the recommended packages:
- Go to
Packages | Settings View | Manage Packages. - Search for the
nuclidepackage, and click on the package’s Settings button. - Select the Install Recommended Packages on Startup checkbox.

Installing Nuclide Server
If you want to use Nuclide for remote development, you’ll also need to set up the npm nuclide
package. Instructions can be found in the Remote Development docs.
Other Installations
To benefit from all of Nuclide’s features, we recommend you also install the following:
- Watchman - version 3.2 or above. It must be in
/usr/local/bin/or in your$PATHenvironment variable.
Without Watchman, Nuclide will lose some functionality of its Mercurial, Remote Development, and Quick Open features.
